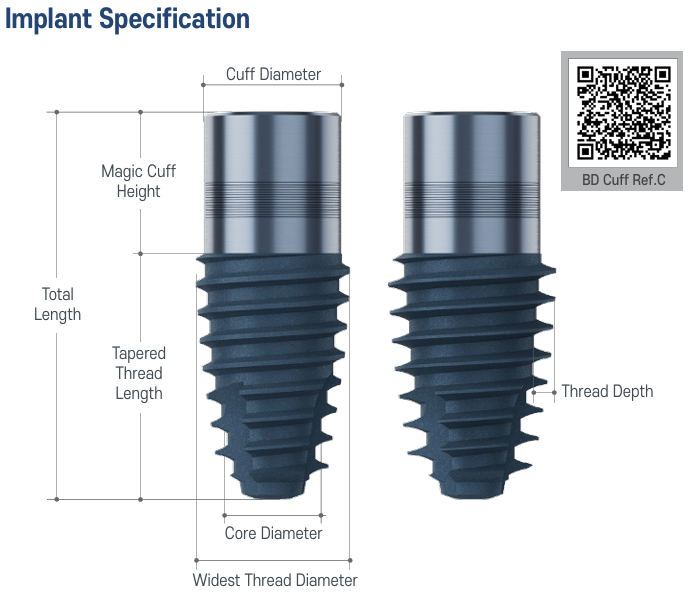
BD Cuff® implantaat
Simplified molar solution
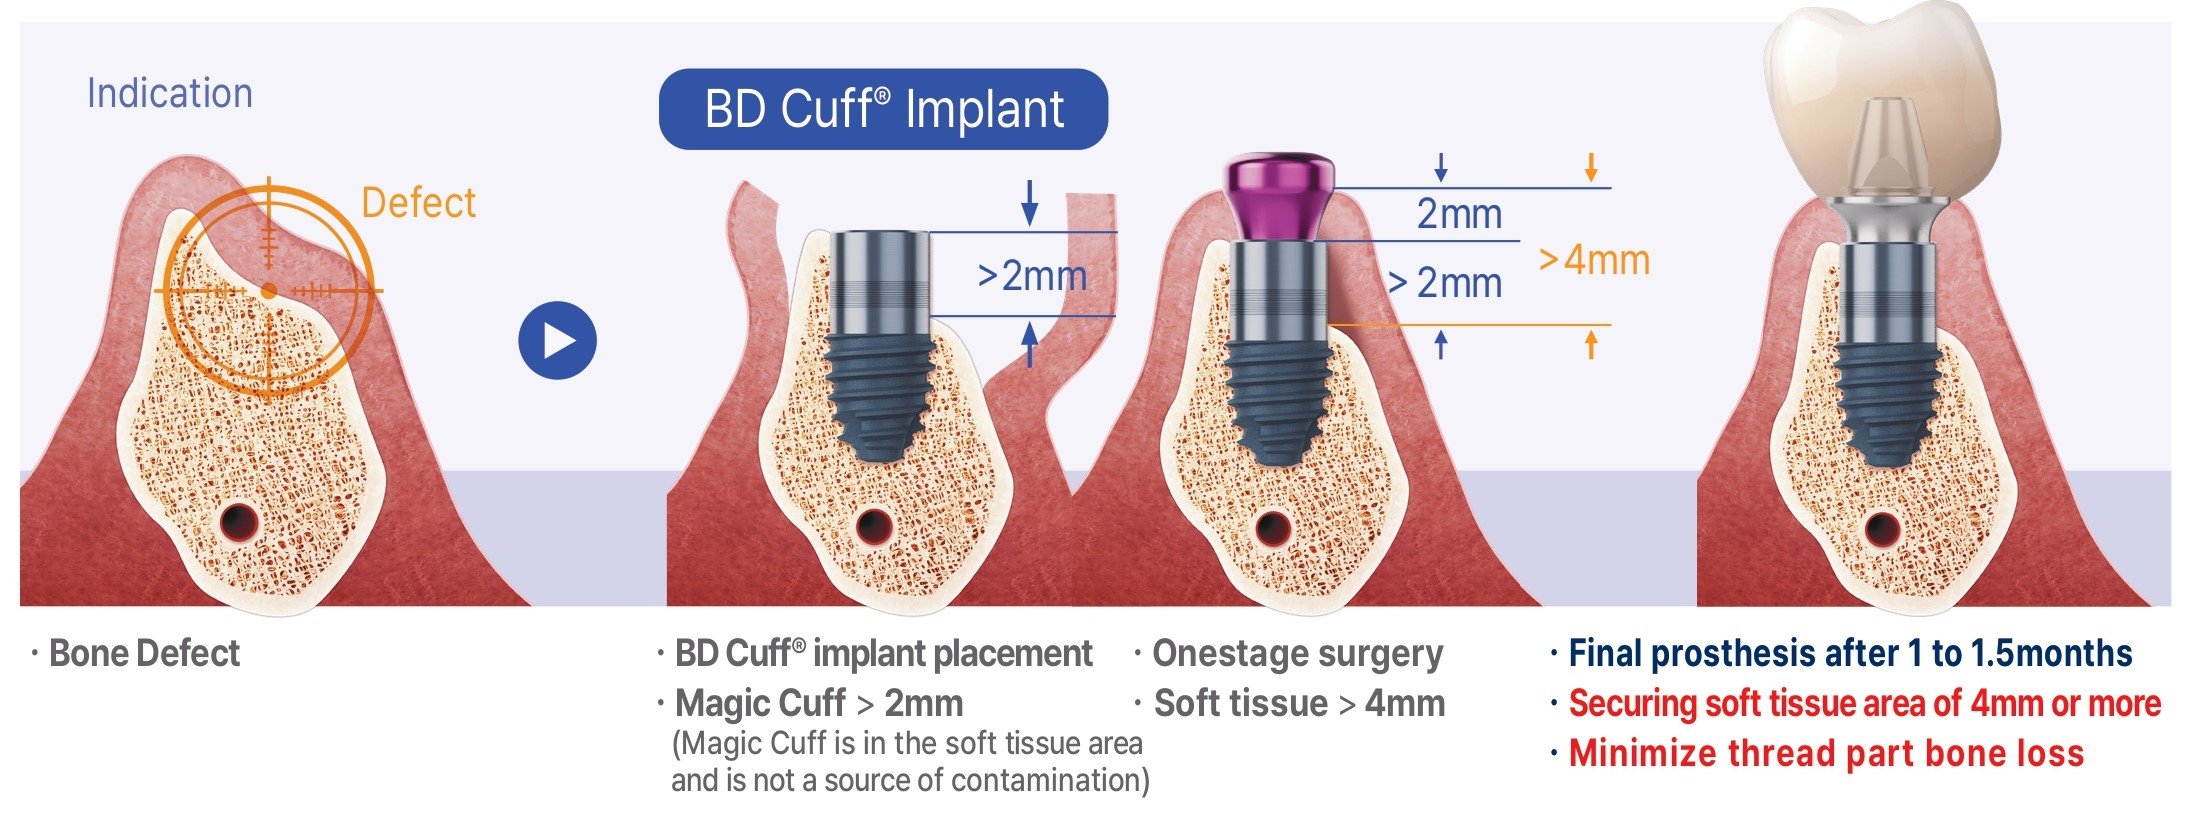
BD Cuff® on eeskätt posterioorse piirkonna jaoks loodud implantaatlahendus. Selle spetsiaalne cuff-disain kaitseb implantaadi ja koe liidest, toetab tervet pehmekoe integratsiooni, aitab teatud juhtudel vältida GBR-i ning vähendab krestaalse luu kadu.
BD Cuff pole Tissue Level implantaat, sest tegemist pole poleeritud kaelaga, vaid see on masin-töödeldud ja kaetud XPEED pinnakattega. See tagab luuharja püsimise ka implantaadi cuff-osa ümber.
Tulemuseks on suurem implantaadi stabiilsus, pikaajaline esteetika ja suurem kindlustunne nii arstile kui patsiendile.
Easier, faster and more comfortable
BD Cuff enables implant placement in thin alveolar bone, low bone height, or defective alveolar bone using a simple epicrestal placement technique
Streamlined one-stage surgery – final prosthesis placement possible within 1-1.5 months.
BDCuff is designed to protect implants from complications – with adequate soft tissue height (>4mm), BD Cuff® implants prevent crestal bone loss and contamination, especially in areas with thin gingiva (<2mm).

Blue Diamond implant strength + ARi design concept
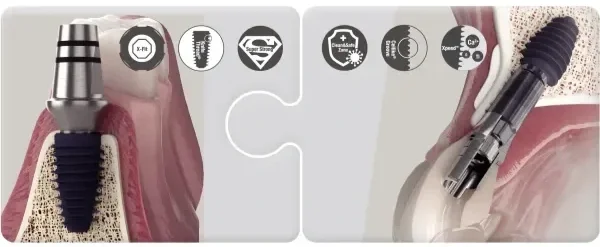
Features proven BlueDiamond X-FIT® connection, compatible with existing BlueDiamond components, and innovative ARi design.
The Magic Cuff design prevents complications such as peri-implantitis due to bone loss and is easy to remove even when it occurs.
Kui oled antud lahendusest huvitatud, võta meiega ühendust!
Selecting BD Cuff Implants
1. Assess the available bone height
Measure the distance from the crestal bone to the inferior alveolar nerve to determine the total implant length that can be placed.
Example: 9mm
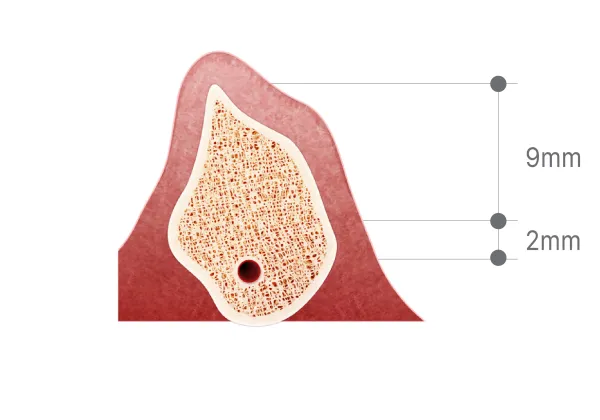
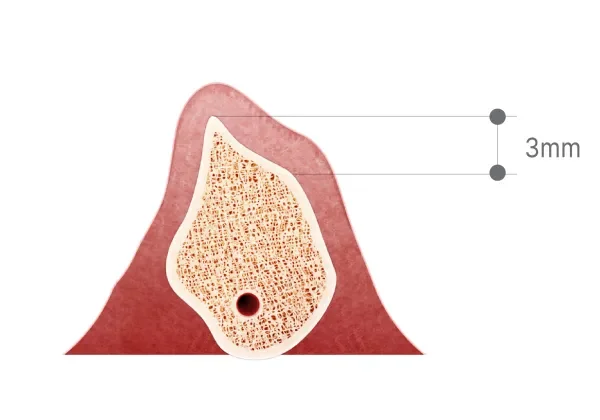
2. Determine the cuff height
Check the height of the defective bone. Measured height will be the cuff height of the implant.
Example: 3mm -> select 4 mm cuff height
Total 9mm (5 mm thread length + 4 mm cuff height)
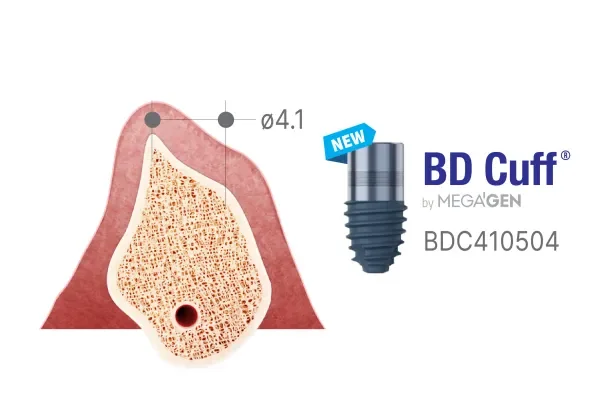
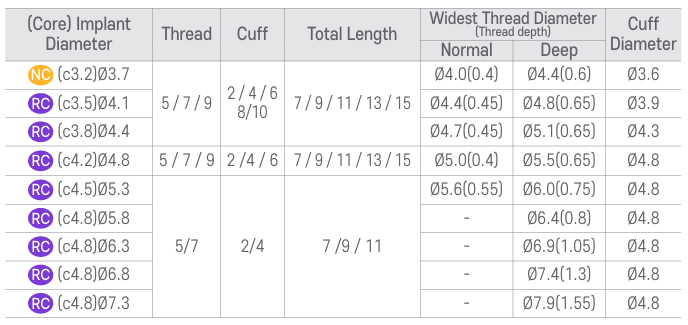
3. Determine implant diameter
The diameter should match the site-specific bone and gingival conditions for optimal stability.
Example: Ø 4.1 -> BDC410504
Drilling & placement
4. Follow the drilling process
Perform the drilling sequentially based on the total length of the final selected implant. Adjust drilling based on bone density (D1 / D2) and implant diameter.
Example: Ø 4.1 Lance drill -> Ø 2.5 drill -> Ø 2.9 drill -> Ø 3.3 drill -> Ø 3.6 drill -> Ø3.9 drill
5. Ensure proper insertation torque
Maintain an insertion torque of 80Ncm or less when using the 45Ncm ratchet connector for safe and effective implant placement.
* If gingiva volume reinforcement is required, add bone grafting material
BD Cuff implantaat – tagasiside
Kristina Saarepera
Kirurg, implantoloog (K3 Hambaravi)
„Olen varem kasutanud AR Short’i edukalt. BlueDiamond Cuff on hea lahendus ja näidustatud teatud olukordades.“
Regina Kuningas-Ott
Kirurg, implantoloog (Hanzadent)
„Mulle meeldib, et see laiendab ja avab mitmesuguseid implantatsiooni võimalusi ilma augmentatsioonita.“
Tauri Narits
Suu-, näo- ja lõualuukirurg (Tartu Ülikooli Kliinikumi Stomatoloogiakliinik)
„Minu hinnangul on tegemist väga huvitava ja teatud juhtudel selgelt põhjendatud alternatiiviga. Eriti eakate patsientide ja All-on-X lahenduste puhul, kus luuline regeneratsioon ei ole hea prognoosiga, võib see olla praktiline ja kliiniliselt mõistlik lahendus.“
Kaspars Stāmers
Suu-, näo- ja lõualuukirurg (RSU Implantology Clinic, Läti)
„Minu hinnang BlueDiamond Cuffile on väga positiivne uuendus – see on väärtuslik valik keerulistes kliinilistes olukordades, kui patsiendi luumahud on piiratud.“